Felicita Decor
Creating a stunning bow with satin ribbons can elevate any gift or decor. According to renowned floral designer Sarah Thomas, "A well-tied bow can transform the ordinary into the extraordinary." This highlights the importance of mastering the art of bow tying, particularly in crafting an elegant and professional appearance.
When considering how to tie a professional bow with satin ribbons, it’s essential to understand the nuances of the materials. Satin ribbons have a smooth, glossy finish, making them a popular choice for upscale presentations. The right technique is crucial; even a minor slip can affect the bow’s overall look. Practice is key, as it can be challenging to achieve the desired outcome on the first try.
In every attempt, there is room for improvement. Not every bow will look perfect right away. Reflecting on mistakes can lead to better results. Finding a method that suits your style can be rewarding. The process of making bows invites creativity and personalization. Each bow tells a story, adding a special touch to your gifts or decorations.
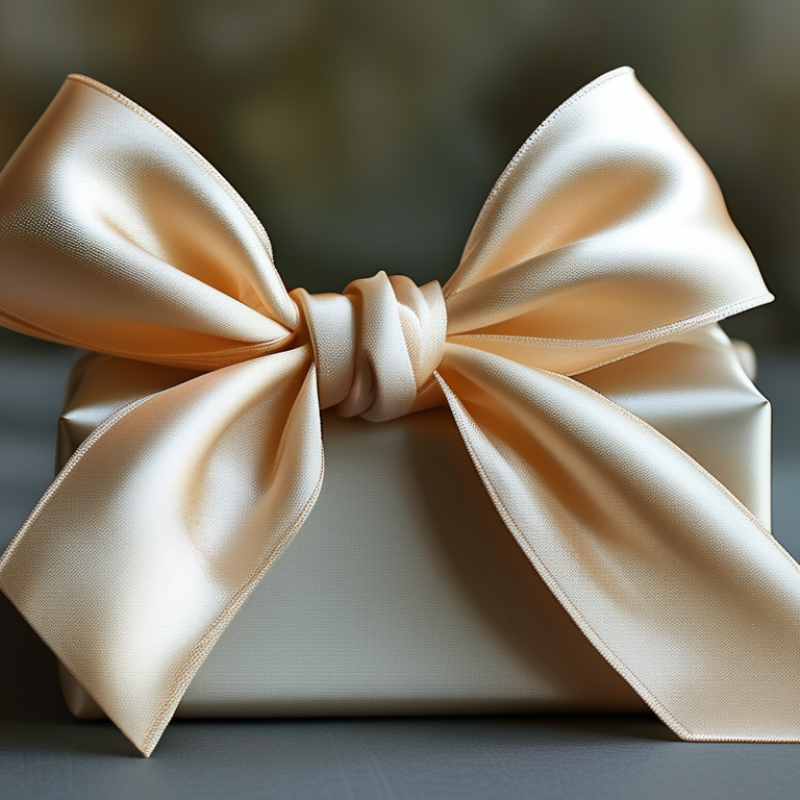
Satin ribbons are popular for their elegance and versatility. They come in various types and quality levels. Understanding these differences is crucial for creating professional bows. Silk satin, for example, has a luxurious feel but can be more expensive. Polyester satin is durable and comes in many colors. It’s often easier to work with and maintains its shape well.
Quality also matters when choosing satin ribbons. Look for a smooth, glossy finish. Check the weight; heavier ribbons tend to drape better. Ribbons that fray less will save time and effort. Professional outcomes often rely on these details. A poorly chosen ribbon can ruin even the most complicated bow.
Remember that practice makes perfect. It's normal to struggle with technique initially. Don’t hesitate to experiment with different types of ribbons. You might find unexpected results that you appreciate. Each type has its quirks that may surprise you. Embrace those imperfections; they might lead to unique, professional-looking bows.
When creating a professional bow with satin ribbons, having the right tools is essential. Start with high-quality satin ribbon, ideally between 1 to 2.5 inches wide for a classic look. Scissors help in achieving clean edges, so keep a sharp pair handy. Glue dots or double-sided tape are also crucial for securing your bow in place.
Tips: Always measure the length of ribbon needed before cutting. This helps prevent waste and ensures a more polished appearance. A wire-edged ribbon can provide extra structure, making it easier to form your bow. Additionally, a ruler ensures even loops for the perfect bow shape.
Avoid rushing the process. Take your time to adjust loops and tails, as this affects the final presentation. Practice different bow techniques, as mastering them can take time. Don't hesitate to experiment with various sizes and styles to find what suits your needs best. Remember, each attempt is a chance to improve.
Creating a classic satin ribbon bow can elevate your gift wrapping or home decor. Begin with a length of satin ribbon. Choose a color that complements your project. A smooth surface helps in achieving a polished look.
Start by making a loop with the ribbon, leaving a tail for tying later. The loops should be of equal size. If they are not, you may end up with an unbalanced bow. Create another loop, crossing it over the first one. This part can be tricky; adjust the loops for symmetry as you go.
Secure the center of the bow by wrapping the tail around it. It may take a few attempts to get the tightness just right. An overly tight bow can be hard to manipulate. Finish by tying a knot at the back. Sometimes, practicing a few times helps in troubleshooting any issues you might encounter. Remember, perfection isn’t always the goal. Each bow can tell a unique story, and that’s part of its charm.
When it comes to tying satin ribbons, creativity knows no bounds. Explore different bow styles that can elevate your gifts or decorations. One popular design is the classic loop bow. It features several evenly sized loops, creating a full and balanced look. Use multiple colors of satin ribbon to add depth and interest. A wider ribbon works best for this style, making the loops more pronounced.
Another intriguing option is the twisted bow. This style incorporates a playful twist, giving the bow a unique flair. Begin by creating two loops of equal size, then gently twist them together at the center. You can easily vary the number of loops for a more complex design. Pair this with contrasting satin colors for added visual appeal. Creating a twisted bow may take some practice. Don’t hesitate to try different techniques to achieve the perfect look.
For a rustic touch, consider the unkempt bow. This design embraces imperfection and has a relaxed vibe. Instead of precise loops, allow the ribbon to drape loosely. Aim for asymmetry to enhance the charm. Using a matte satin ribbon can amplify this effect. While it may seem simple, achieving the right balance can be challenging. Experiment with varying lengths and widths to find what works best for your projects.
| Bow Style | Description | Ideal Use | Difficulty Level |
|---|---|---|---|
| Classic Bow | A simple, timeless bow tied with two loops. | Gift wrapping and decorations. | Easy |
| Double Loop Bow | A bow with two loops for extra volume. | Weddings and formal events. | Medium |
| Tulle Bow | A soft, airy bow made from tulle and satin. | Bridal bouquets and décor. | Medium |
| Shoelace Bow | A casual bow, similar to shoelace tying. | Casual gift wraps. | Easy |
| Pinwheel Bow | A fun and playful bow with multiple loops. | Children's gifts and festive occasions. | Medium |
| Ribbon Rose Bow | A bow that resembles a rose using folded ribbon. | Special occasion gifts. | Hard |
| Stacked Bow | Multiple bows stacked for a layered effect. | Large gift boxes. | Hard |
| Bow Tie | A refined, elegant bow often used in fashion. | Fashion accessories and stylish gifts. | Medium |
| Floral Bow | Incorporates faux flowers into the bow design. | Bouquets and centerpieces. | Hard |
| Braided Bow | A unique bow created using braided ribbons. | Creative crafts and displays. | Medium |
Maintaining satin ribbon bows requires care and attention to detail. To keep them looking fresh, store them in a cool, dry place. Avoid direct sunlight, which can fade colors. Wrinkles can make bows look less appealing. Gently steam them to remove any creases. This step brings back their original beauty.
Displaying your satin bows is equally important. Consider using a decorative box or shadow box. This protects them from dust while showcasing their elegance. You can also hang them on a wall using clips, creating a stunning visual display that emphasizes their textures and colors. Ensure that bows are not squished or tangled.
Reflect on your technique for tying the bows. Practice makes perfect. Sometimes, the knots can be a bit uneven or looser than intended. Don’t rush this process. Take your time to ensure that each bow reflects your unique style. With practice, you'll find the right balance between beauty and functionality.
: You need high-quality satin ribbon, sharp scissors, glue dots or double-sided tape, and a ruler.
Always measure the length needed before cutting. This prevents waste and ensures a neat finish.
Ideally, use satin ribbon between 1 to 2.5 inches wide for a classic bow appearance.
Make sure the loops are equal in size. Adjust them during the process for balance.
Store them in a cool, dry place away from sunlight. Gently steam out wrinkles to keep them looking good.
Use a decorative box or hang them on a wall. Make sure they are not squished or tangled.
Yes, each attempt tells a unique story. Focus on improvement rather than perfection.
Regular practice is important. It's common for knots to be uneven at first, but you will improve over time.
If a bow isn't right, practice adjusting loops and tightening knots. Reflection on your technique helps.
Rushing can lead to mistakes. Take time to ensure each bow showcases your personal style beautifully.
In the article "10 Best Ways to Tie a Professional Bow with Satin Ribbons," readers will discover essential knowledge about satin ribbons, including their types and qualities that are crucial for crafting professional bows. To successfully learn how to tie a professional bow with satin ribbons, the article provides a comprehensive list of necessary tools and a detailed step-by-step guide to creating a classic satin ribbon bow.
Additionally, the article explores creative variations of bow styles that can be made using satin ribbons, encouraging readers to experiment with different designs. Finally, valuable tips on maintaining and displaying satin ribbon bows are offered, ensuring that your creations remain beautiful and well-presented. This resource serves as a complete guide for anyone looking to master the art of bow tying with satin ribbons.
