Seasonal garlands can transform a doorway, mantel, or staircase within minutes. Yet many homeowners avoid nails and screws because they may damage paint, plaster, wood, or rental walls. This guide explains How to hang garlands without using nails or screws, using removable hooks, adhesive clips, tension rods, and carefully hidden ties.
The need for flexible decorating methods is growing with home improvement activity. Harvard’s Joint Center for Housing Studies continues to track substantial homeowner spending on remodeling and maintenance projects. The National Retail Federation also reported U.S. holiday sales reaching approximately $964 billion in 2023, showing how strongly seasonal decorating influences household purchases. These figures do not prove every hanging method works. They do show why practical, low-damage installation advice matters.
Start with the surface.
Clean, dry surfaces improve adhesive performance. Always check the manufacturer’s weight limit before adding greenery, lights, or ornaments. A professional approach also considers heat, moisture, traffic, and emergency access. For example, a heavy garland above a busy doorway needs more support than a lightweight strand on a sealed cabinet.
Test one small section first. It may feel overly cautious, but paint can lift unexpectedly. I have found that uneven walls and dusty trim often defeat otherwise reliable hooks. This article will compare attachment methods, explain spacing, and identify common mistakes. It will also acknowledge an important limitation: “removable” does not mean risk-free. Careful preparation remains the safest decoration strategy.
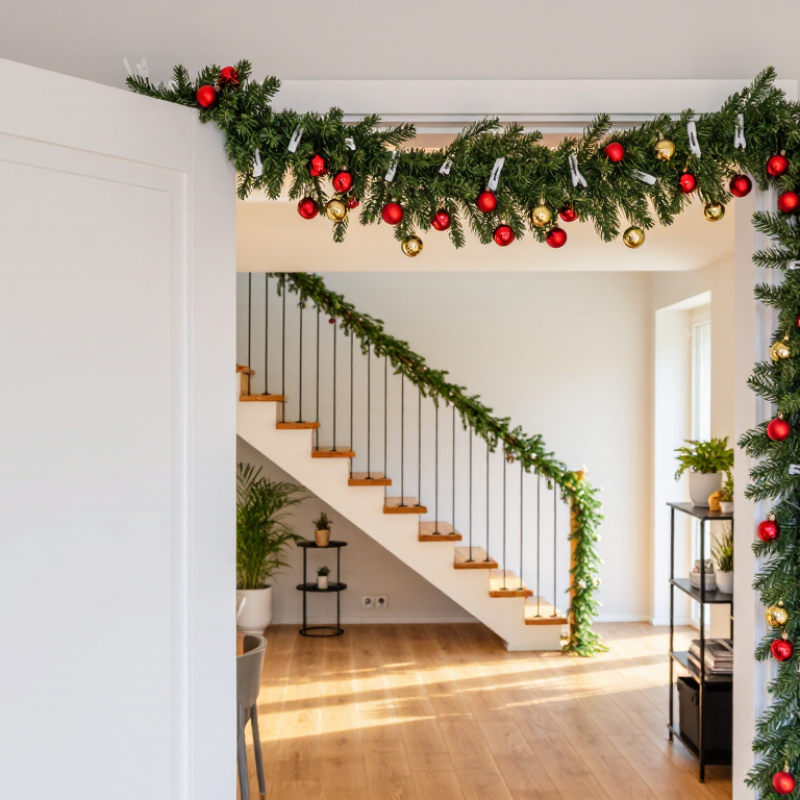
Choose a Garland-Hanging Method for Your Wall and Surface Type
How to Hang Garlands Without Nails or Screws?
Choose a Garland-Hanging Method for Your Wall and Surface Type
For smooth, painted drywall, removable adhesive hooks are usually the cleanest option. Clean the area with a dry cloth, then let it fully dry. Choose hooks rated above the garland’s weight. This small margin matters. Place hooks every 30 to 45 centimeters for even support. I once spaced them too far apart, and the garland sagged by evening. Press each hook firmly and wait before adding decoration.
Glass, glazed tile, and sealed metal need a different approach. Suction cups can work well on these nonporous surfaces, especially for lightweight greenery. Wipe away dust and moisture first. On tile, avoid placing pressure directly over cracked grout. A removable adhesive hook may hold better on smooth tile, but test it in a hidden corner. Humidity can weaken adhesion. That detail is easy to overlook.
Textured plaster, wallpaper, and unfinished brick are more challenging. Adhesive products may lift paint or fail to grip. Try a tension rod across a doorway, shelf, or recessed opening. For a mantel, place the garland over existing corners or secure it with soft, removable ties. Wooden trim can accept small clips designed for temporary use, but check the finish first. Never pull decorations down sharply. Even careful methods can leave marks, and I have learned that “removable” does not mean risk-free.
Gather Removable, Nail-Free Hanging Materials and Tools
How to Hang Garlands Without Nails or Screws?
Gather removable, nail-free hanging materials and tools before touching the wall. Choose removable adhesive strips, clear decorating clips, soft cotton cord, scissors, a measuring tape, and a clean microfiber cloth. For textured paint, brick, damp rooms, or freshly painted surfaces, test a hidden area first. Adhesion depends on dust, moisture, temperature, and surface coating. That small test matters.
The 2024 U.S. Houzz & Home Study reported median renovation spending of $60,000 in 2023. That figure reinforces one practical lesson: protect finished surfaces during small seasonal updates.
Wipe each mounting spot with a suitable cleaner, then let it dry completely. Space clips every 30 to 45 centimeters, especially beneath heavier greenery. Keep the cord loose enough to avoid pulling. I once placed clips too far apart, and the garland sagged like a tired vine. My first attempt looked acceptable, but it was not secure.
Tips:
Use lightweight artificial greenery for painted walls. Count the garland’s weight before choosing removable supports. Press each clip firmly for several seconds. Wait for the recommended setting period. Hang the garland gently, not suddenly. Remove it slowly, pulling the adhesive tab parallel to the wall.
The 2023 National Association of Realtors Remodeling Impact Report notes that 87% of consumers found increased satisfaction after completed remodeling projects. Small damage can spoil that satisfaction. Check the wall again after one hour. Sometimes the safest plan needs adjusting.
Prepare the Surface Before Attaching the Garland
Before attaching a garland, prepare the surface carefully. Dust, cooking film, and invisible moisture can weaken temporary adhesion. The 2023 International Surface Preparation Guide reports that contamination is a leading cause of coating and adhesive failure. That lesson applies to seasonal decorations too. Wipe painted walls, glass, tile, or sealed wood with a clean, slightly damp cloth. Remove grease with mild soap, then let the area dry completely. Do not rush this part.
Check the surface temperature and condition. Most removable hanging materials work poorly on peeling paint, dusty plaster, damp masonry, or freshly painted walls. A practical test helps: press a small piece of low-tack material onto the area for several minutes. If paint flakes or dust transfers, choose another location. ASTM D3359 evaluates coating adhesion on a 0B-to-5B scale, showing why weak paint layers should not carry extra decoration. A clean, stable surface matters more than stronger pressure.
Measure the garland before fixing it. Mark light contact points with removable tape, leaving slack near corners. Avoid stretching the greenery tightly. That creates unnecessary pull. In my experience, uneven weight causes more failures than garland length. I still sometimes underestimate dust around door frames. Recheck those areas under bright light. Clean, dry, and stable wins.
Install the Garland Step by Step Without Nails or Screws
Hanging a garland without nails or screws is simple when the surface and weight are carefully matched. I have found that preparation matters more than the decoration itself. Dust, grease, and loose paint can weaken any adhesive.
Measure the area and mark the route with small pieces of painter’s tape. Clean the surface with a dry, lint-free cloth, then let it dry completely. Choose removable adhesive hooks or clips rated above the garland’s total weight. Lightweight hooks work well for fabric, paper, or artificial greenery. Avoid placing them on damp, rough, freshly painted, or peeling surfaces.
Attach the hooks at even intervals, usually 30 to 45 centimeters apart. Leave extra support near corners and ends. Press each hook firmly for the time stated in its instructions. Do not hang the garland immediately. Waiting helps the adhesive bond properly.
Now place the garland gently across the hooks. Let it rest instead of pulling it tight. For a fuller shape, create shallow loops between each support. Check the arrangement from several angles, especially near doorways and stair rails. It should look balanced without blocking movement.
My first attempt sagged because I used too few clips. That was avoidable. If the garland feels heavy, add another support rather than stretching the material. Test one hidden hook first, since some surfaces may lose paint during removal. When taking it down, pull the adhesive strip slowly in the indicated direction. Never yank the hook outward.
How to Hang Garlands Without Nails or Screws
Install the garland step by step with removable, surface-safe hanging points. This chart shows the estimated number of support points needed when spacing them every 12 inches, including one point at each end.
Step-by-Step Installation
- Measure the garland and the surface where it will be installed.
- Mark support locations at approximately 12-inch intervals.
- Clean and dry each surface before applying a suitable removable hanging point.
- Attach the garland from one end to the other, keeping the weight distributed evenly.
- Check that every support point is secure before releasing the garland.
Planning note: The values are calculated from a 12-inch spacing guide: the number of support points equals the number of 12-inch intervals plus one endpoint. Actual requirements may vary with garland weight, surface texture, and installation shape.
Remove the Garland Safely and Repair-Free After Use
Hanging garlands without nails or screws protects walls only when removal is planned from the start. Choose lightweight garlands and check the adhesive’s stated weight limit. Clean the wall with a dry, lint-free cloth. Avoid dusty, damp, freshly painted, wallpapered, or peeling surfaces. Test one small area behind furniture first. This step feels unnecessary, but it can reveal weak paint or hidden texture.
The Joint Center for Housing Studies at Harvard University reported that U.S. homeowners spent about $472 billion on improvements in 2022. Even a small repair can add cost and frustration. Use removable adhesive designed for the wall surface, and allow the recommended setting time before hanging the garland. Keep it away from heaters, candles, sprinklers, and door hinges.
Remove it slowly. Start at one end, support the garland with one hand, and pull the adhesive tab parallel to the wall. Do not pull outward. That mistake can lift paint or tear drywall paper. If the strip resists, stop and warm the area gently with a hair dryer on a low setting. Never use a blade or solvent without checking the surface instructions. I once rushed this step and left a faint paint mark. The method is repair-free only when patience is part of the method. Inspect the wall under bright light, then wipe away small adhesive traces with a clean, dry cloth.
Conclusion
Learning how to hang garlands without using nails or screws begins with choosing a method suited to your wall and surface type. Lightweight garlands may be secured with removable adhesive hooks, reusable clips, or carefully placed double-sided mounting strips, while delicate surfaces require gentler options such as tension-based supports or temporary ties. Before attaching anything, clean and dry the surface, remove dust and grease, and test the chosen material in a discreet area. Measure the garland’s length and mark the support points so the finished display looks balanced.
Install the garland gradually, attaching each support point without stretching the decoration too tightly. Distribute its weight evenly and check that doors, windows, and walkways remain unobstructed. When the display is no longer needed, remove the garland first, then detach each support slowly according to its design. Peeling adhesive materials gently and keeping the surface clean can help prevent residue, paint damage, or visible marks, allowing the area to remain neat and repair-free.
 Felicita Decor
